
Cosplay Upgrade Tutorial: Princess Kitana | Mortal Kombat

This content may contain affiliate links. This means that if you make a purchase through one of the links, I may receive a commission. This commission comes at no additional cost to you, and I only recommend products that I personally love.
Hey there, cosplayer! Ready to rock an epic Princess Kitana Mortal Kombat cosplay? This cosplay tutorial is a bit different since I bought a base Kitana cosplay, but what I’ll be showing you is how I upgraded mine to make it look fancy and fit better. I’ll also include a video tutorial on how I made Princess Kitana’s bladed fans on a budget.
Ready to dive in? First stop, reference images for inspiration. Then we’ll create your shopping list and budget so that you can gather all necessary items. Once you have a solid plan, we’ll dive deeper into a detailed tutorial broken down step-by-step!
Excited? Let's begin! 🗡️🪭👊🌟
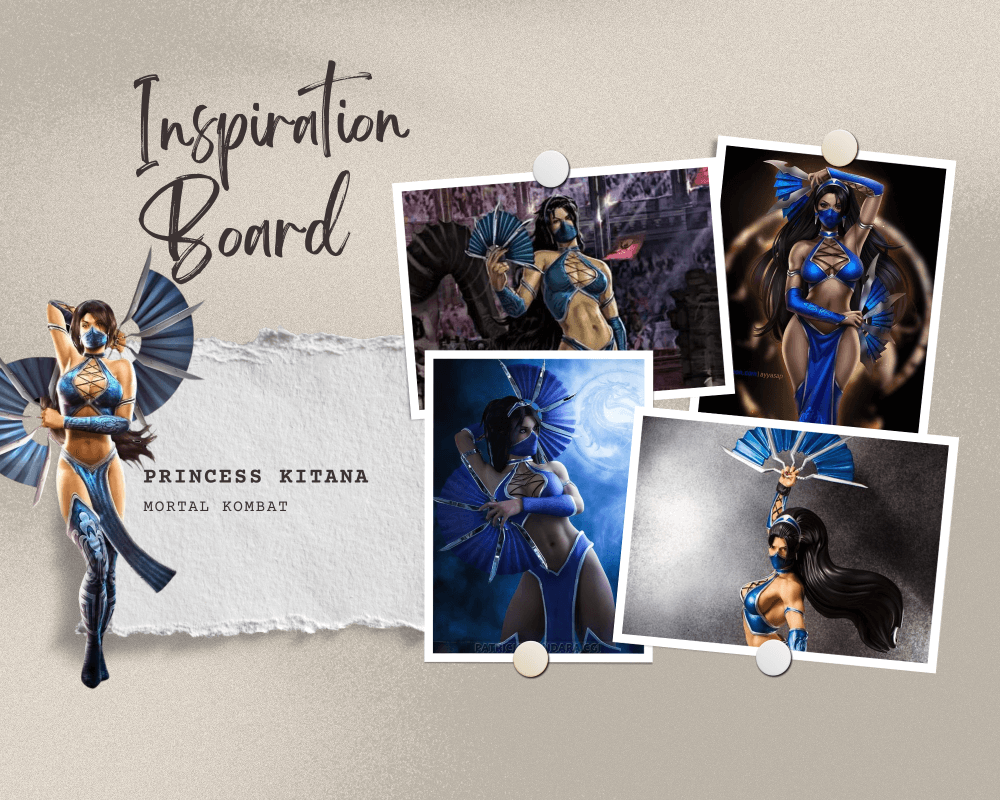
PRINCESS KITANA MORTAL KOMBAT INSPIRATION
To begin putting together your Princess Kitana Mortal Kombat cosplay, familiarize yourself with her designs (there are many!). Browse images online, watch game footage on YouTube, watch a show or movie, or better yet - immerse yourself in the game! This will help you capture her essence while wearing her costume.
The good news is, I've simplified this step for you. Below, you'll find my mood board for inspiration, and here's the link to my Kitana Cosplay Pinterest Board for creative ideas (you're welcome 😘... don't forget to follow my Pinterest for more character-specific inspiration).
Just as an FYI, I wasn’t going for 100% canon with my own Princess Kitana Mortal Kombat cosplay. I just wanted something that looked “close enough” that fit my budget. I found a more modest version of her MK9 outfit on Amazon that I liked, and I designed my bladed war fans to go with that look.
PRINCESS KITANA MORTAL KOMBAT COSTUME ITEMS LIST
Once you have a vision of the Princess Kitana Mortal Kombat cosplay you want to create, it’s time to draft up a list of all the items needed for this look.
Here's my item list to help inspire you:
ITEMS NEEDED FOR MY PRINCESS KITANA MORTAL KOMBAT COSPLAY:
Wig
Earrings
Contacts
Costume (headband, mask, top, arm bands, arm sleeves, bottoms, boot covers)
Bladed fans (x2)
Once you know everything that you need to collect, it’s time to go SHOPPING and create a budget.
PRINCESS KITANA MORTAL KOMBAT SHOPPING LIST & BUDGET
Here you’ll find a list of all the supplies I had to buy to make my Princess Kitana cosplay and her bladed war fans. Plus I added up an estimate of how much everything cost me, so you have an idea of what you might be spending.
SUPPLIES I BOUGHT ($CAD):
Base cosplay - $88 (Amazon)
Wig - $20 (SHEIN)
Earrings - $2 (SHEIN)
Shoes - $10 (Thrifted)
Decorative silver “Rhinestone” trim - $2 per pack (x3) (Dollarama)
Blue fans - $20 (Amazon)
Black poster board - $2 (local dollar store)
Coloured "amber” contact lenses - $21 (Clearly.ca)
SUPPLIES I ALREADY HAD:
Dark blue Sharpie (x2)
Black Sharpie
X-Acto knife
Silver pearl paint
White pearl paint
Smooth sponge paint “brush”
Painter's tape
Hot glue gun
Hot glue sticks
Silver studs
Silver thread
Blue thread
Hand sewing needle
Sewing machine
Pins
Dark dry shampoo
Clothing steamer
Sliver earring stud “posts”
Bustier (optional)
Warm nude tights
COSPLAY BUDGET:
$169 CAD
(Please consider treating me to a $5 coffee on Ko-Fi if you get value or inspiration from this tutorial!🙏🥰)
Alrighty then... ready to rock n' roll? Now it's time to get crafting! Scroll down to find the item tutorial you're looking for!
STEP-BY-STEP
PRINCESS KITANA MORTAL KOMBAT COSPLAY UPGRADE TUTORIAL
DIFFICULTY LEVEL:
Easy
Some basic sewing & crafting involved.
All items altered in some way.
TUTORIAL TABLE OF CONTENTS :
Wig Upgrades (Click Here)
Headband Upgrades (Click Here)
Mask Upgrades (Click Here)
Earrings Upgrades (Click Here)
Arm Bands & Sleeves Upgrades (Click Here)
Top Upgrades (Click Here)
Bottoms Upgrades (Click Here)
Boot Cover Upgrades (Click Here)
DIY Kitana Bladed War Fans Tutorial (Click Here)
Store-bought Princess Kitana Mortal Kombat Cosplay Upgrades
Reference Image:

PRINCESS KITANA MORTAL KOMBAT WIG UPGRADES
Starting Point…

I was really lucky to have found a near PERFECT wig on SHEIN for only $20. However, I did do some minimal upgrading to make it look a bit better.
Here’s what I did:
I lightly steamed the bottom half to make the curls more relaxed and add a bit of length.
I used dark dry shampoo to reduce the fake shine.
I used Got2b “Freeze Spray” to part the bangs in the middle and secure them in place.
That’s it! It might seem simple, but these steps go a LONG way in making cheap wigs look better.
The result…

Click here to go back to the Tutorial Table of Contents.
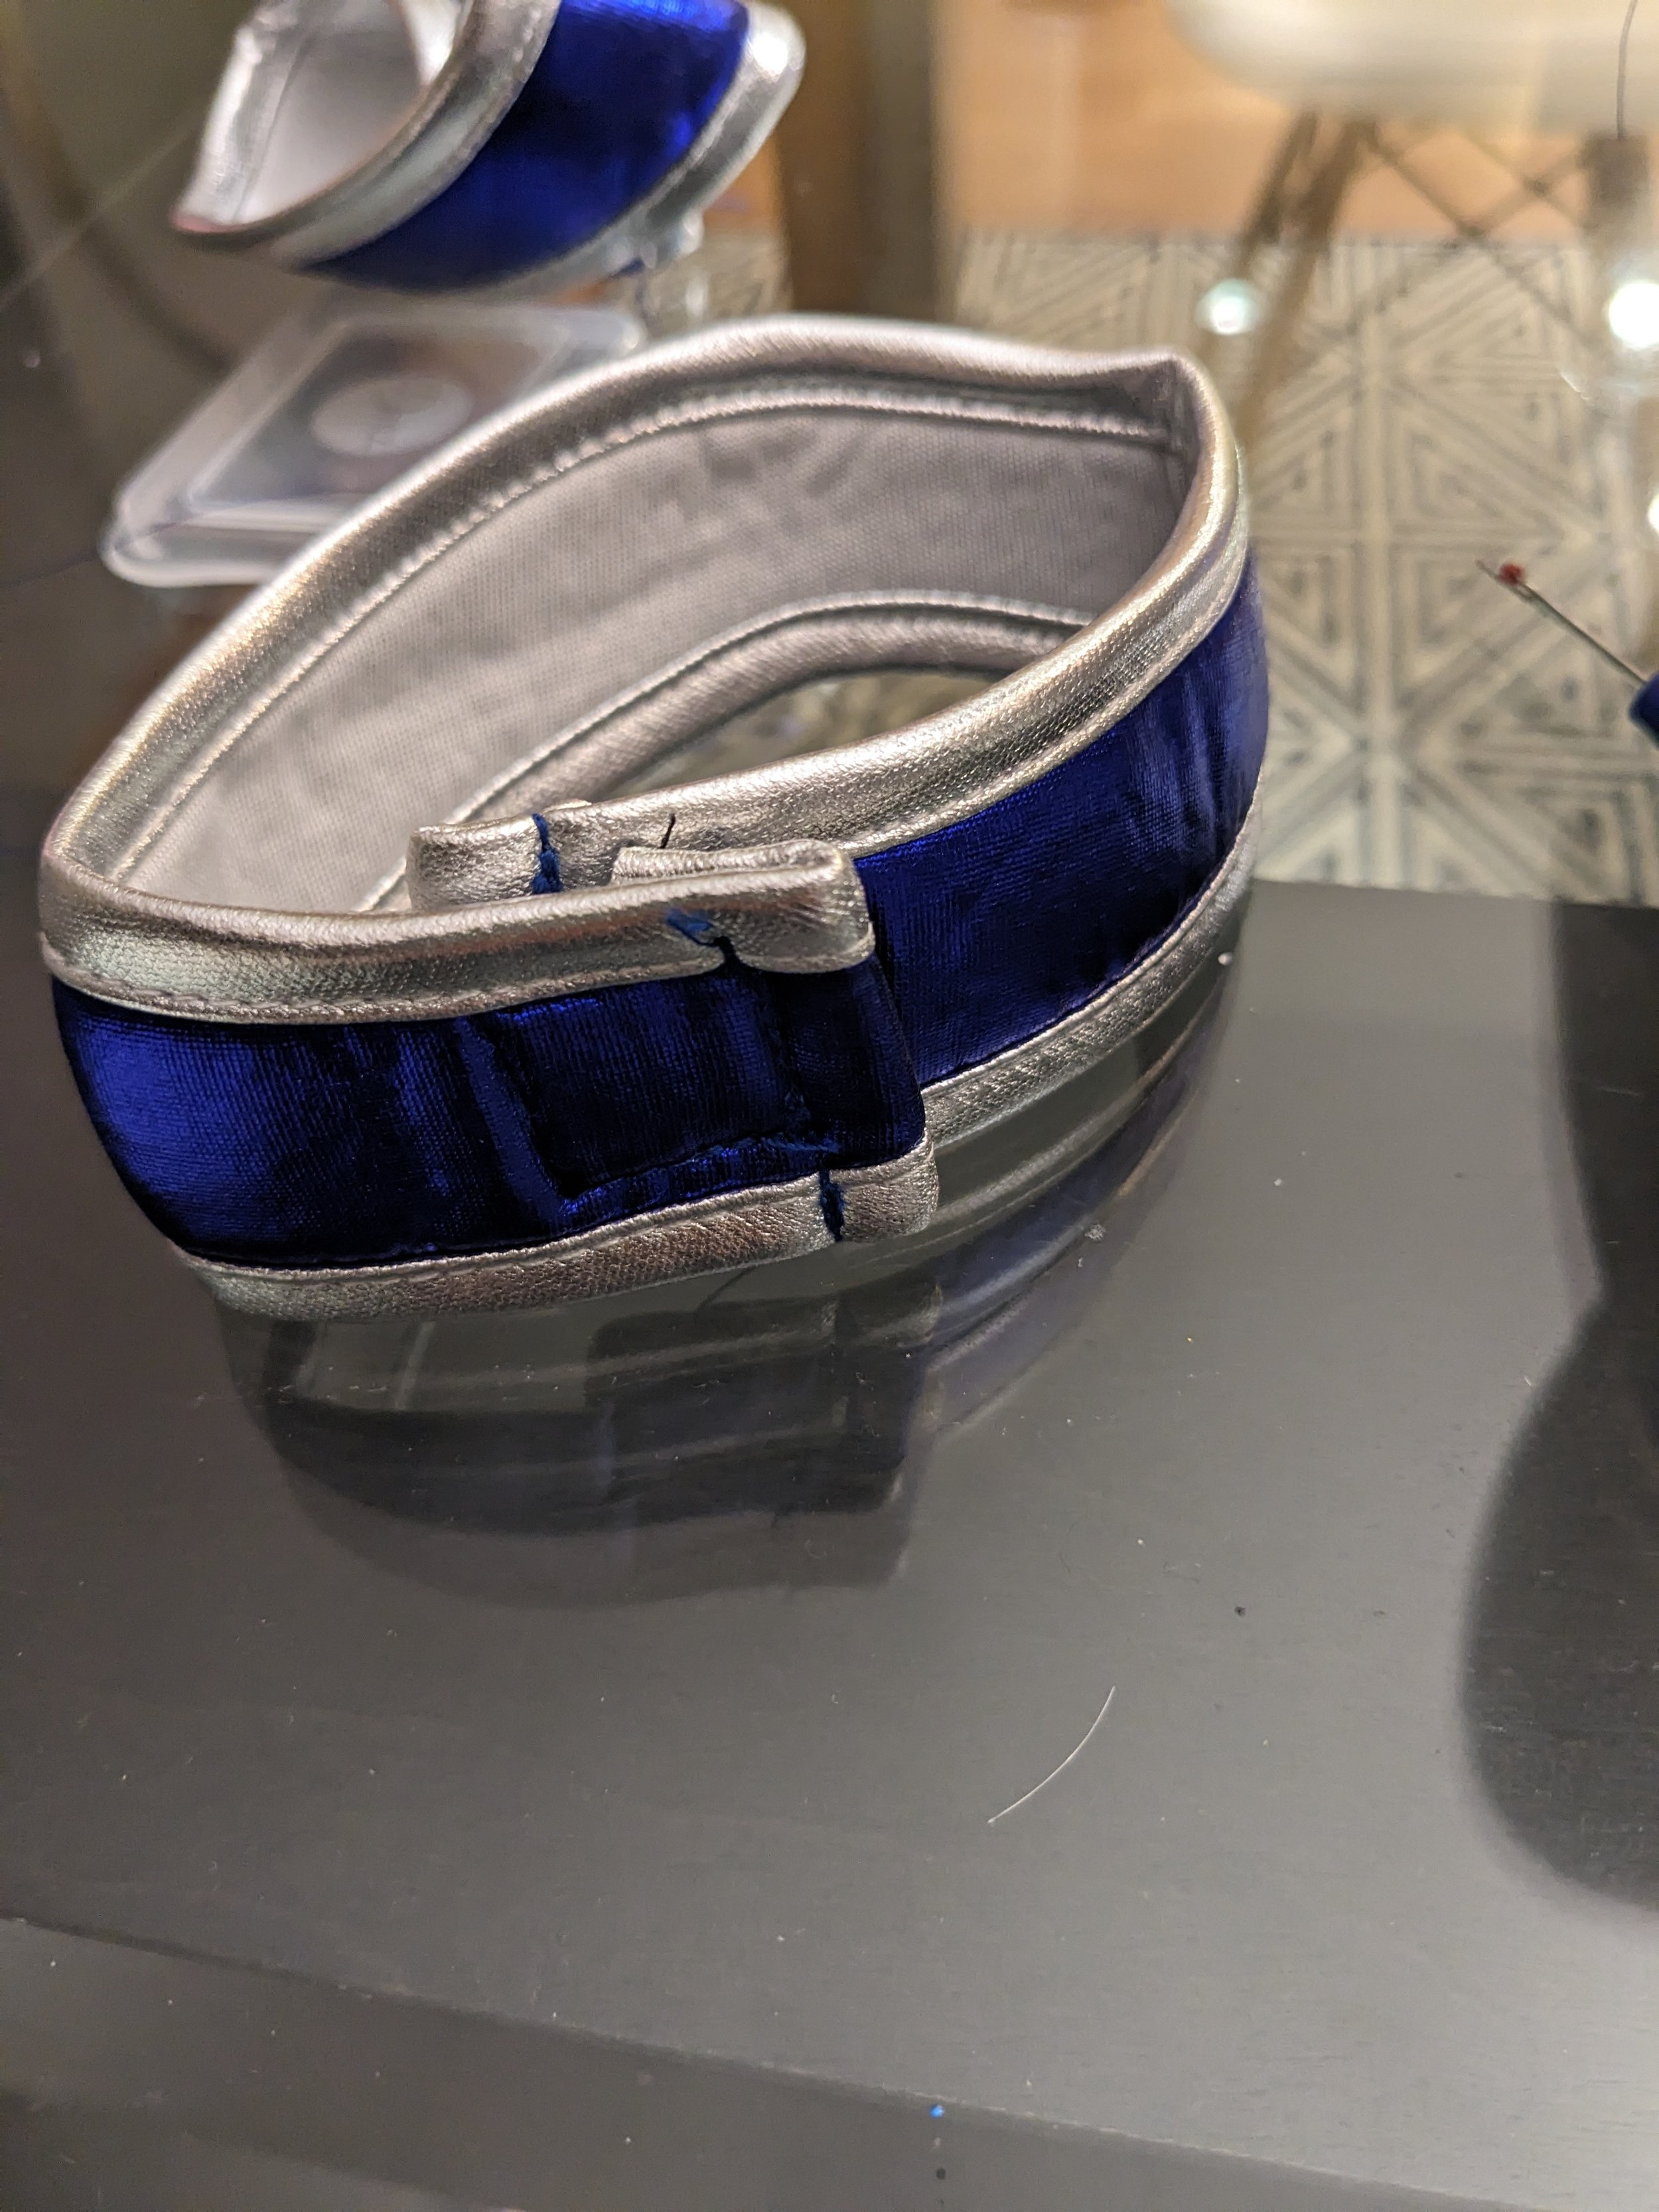
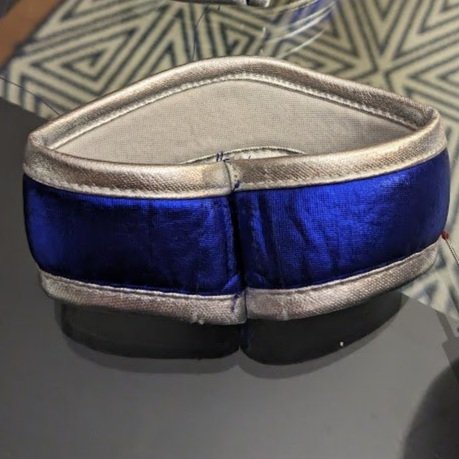
PRINCESS KITANA MORTAL KOMBAT HEADBAND UPGRADES
I forgot to get a full “starting point” picture, but the headband that came with the cosplay was secured with and elastic band.
The upgrades I made to it were:
Removed the elastic and added allegator clips into to secure it to the wig
Hand sewed rhinestone trim to the silver edges
Added a stud in the middle

Click here to go back to the Tutorial Table of Contents.
PRINCESS KITANA MORTAL KOMBAT MASK UPGRADES
Starting point…

The mask was too baggy on my face and the trim looked boring and cheap. So the upgrades I made were:
I took in the mask with my sewing machine to fit my face better.
I hand sewed the rhinestone trim along the silver edges.
The result…

Click here to go back to the Tutorial Table of Contents.
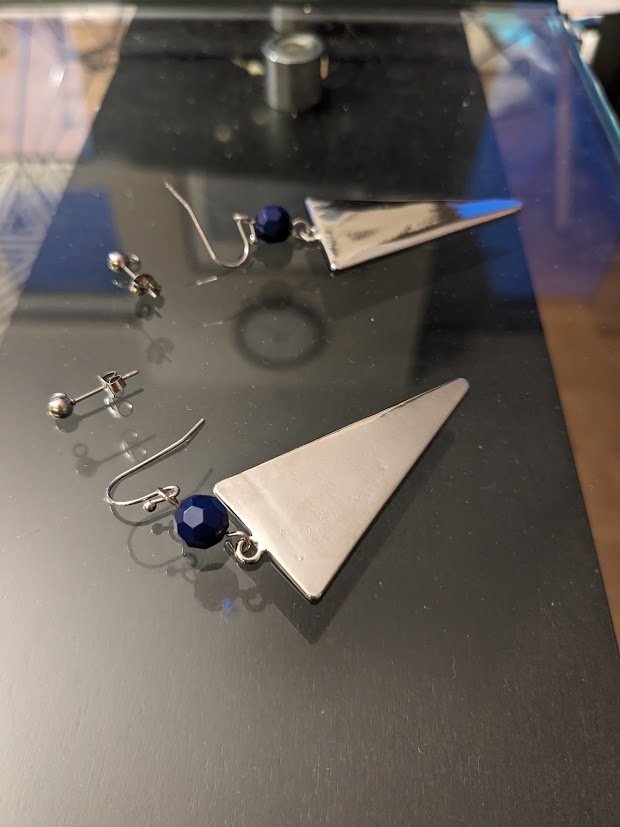
PRINCESS KITANA MORTAL KOMBAT EARRING UPGRADES
Starting point…

So, technically I could have used these earrings “as is” since they are pretty darn close to being canon, but it was bugging me that the blue bead was slighting different than the outfit, so I decided to alter them slightly.
Here’s what I did:
I removed the blue bead & hook earring.
I attached the triangle bead to a plain silver stud earring.
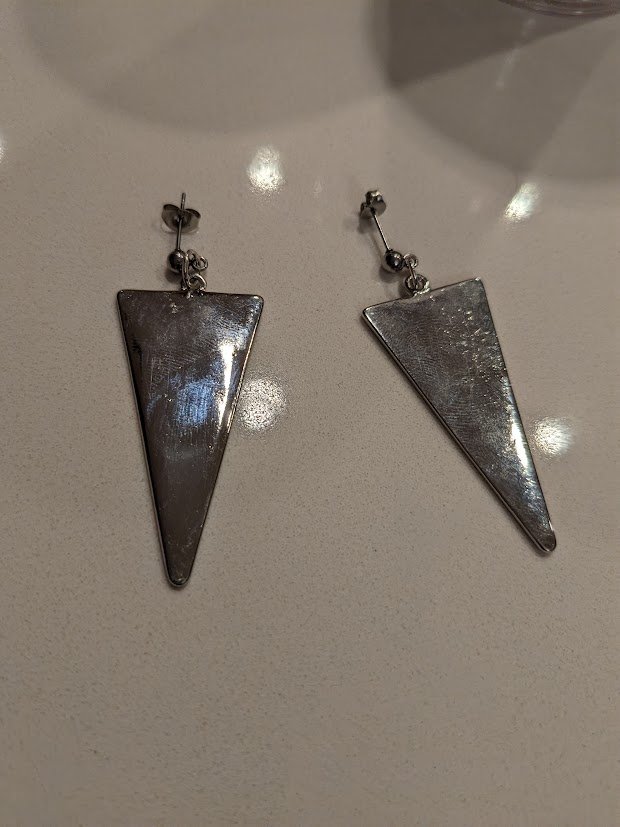
The result…
Click here to go back to the Tutorial Table of Contents.
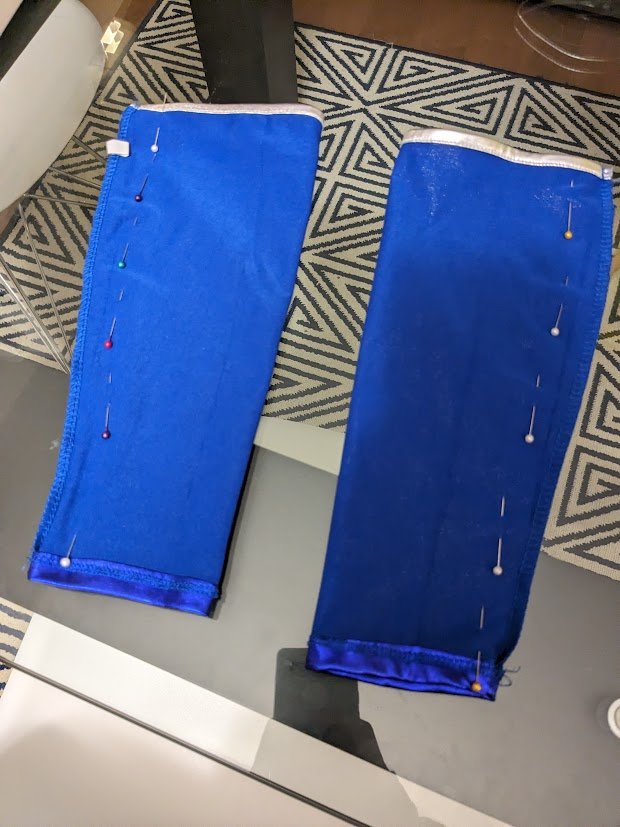
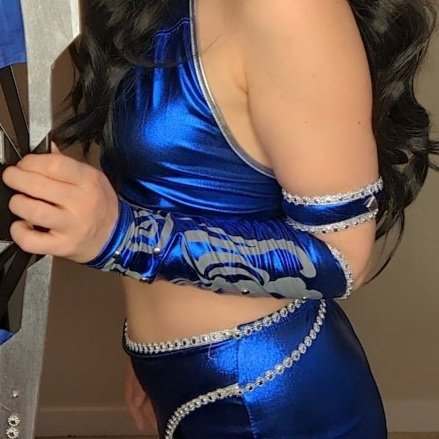
PRINCESS KITANA MORTAL KOMBAT ARM BAND & SLEEVES UPGRADES
Starting points…
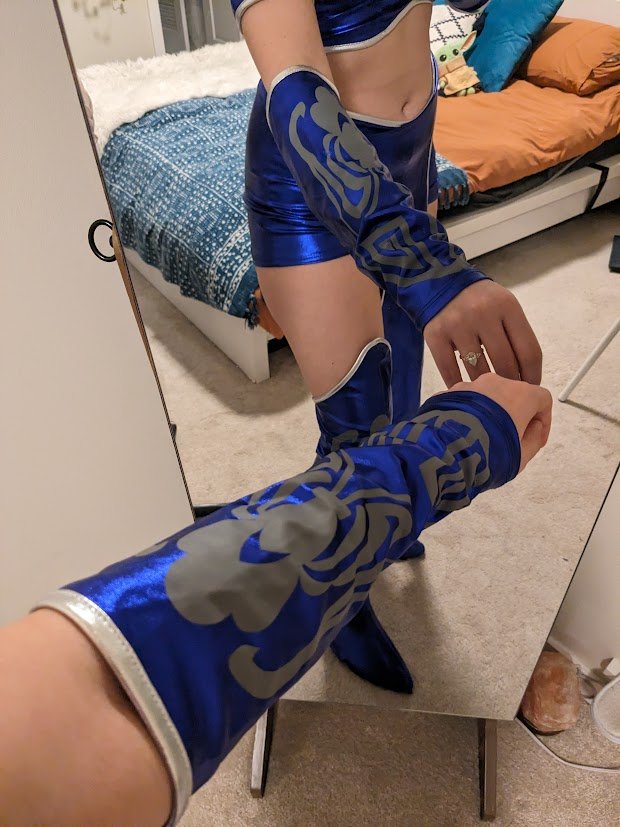
The arm sleeves were soooooo baggy on my forearms, and the upper arm bands had some ugly velcro on them.
So to make them look better I did this:
I took in the forearm sleeves with my sewing machine.
I removed the velcro from the armbands and sewed them close.
I hand-sewed sliver rhinestone trim to the silver edges.
I added some studs to give the flat design more texture and depth.
The results…
Click here to go back to the Tutorial Table of Contents.
PRINCESS KITANA MORTAL KOMBAT TOP UPGRADES
Starting point…
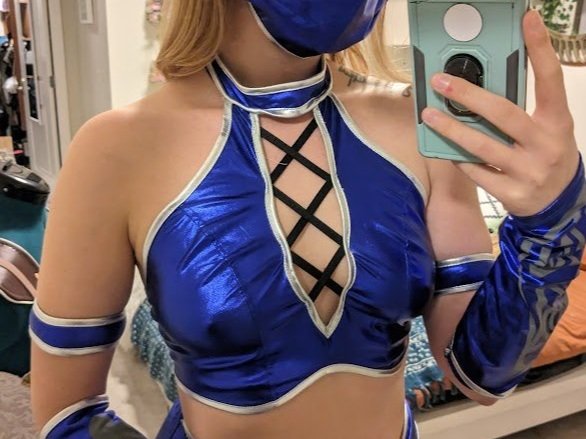
The top fit me pretty good to start, so I didn’t have to do much sewing to alter it, but I did make a few small changes:
The reviews on Amazon said that the velcro on the neck sucked. So I removed it and added a larger, more heavy-duty, piece (I reeeeeeeally didn’t want it to com eundone while wearing it lol).
I hand sewed the silver rhinestone trim along the silver edges (except for under the arms because that area needs to stay stretchy).
I added studs along the collar and the black “lace up” elastic.
Optional: I also wore a black bustier underneath because it was cold that February day at the convention.
The result…

Click here to go back to the Tutorial Table of Contents.
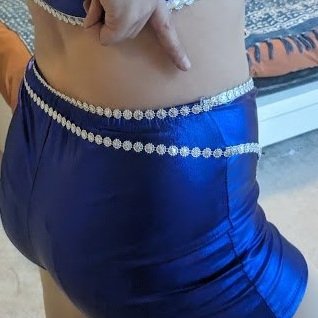
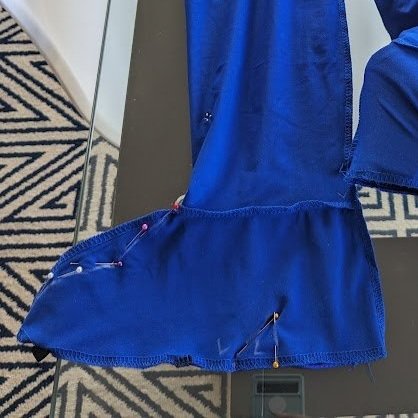
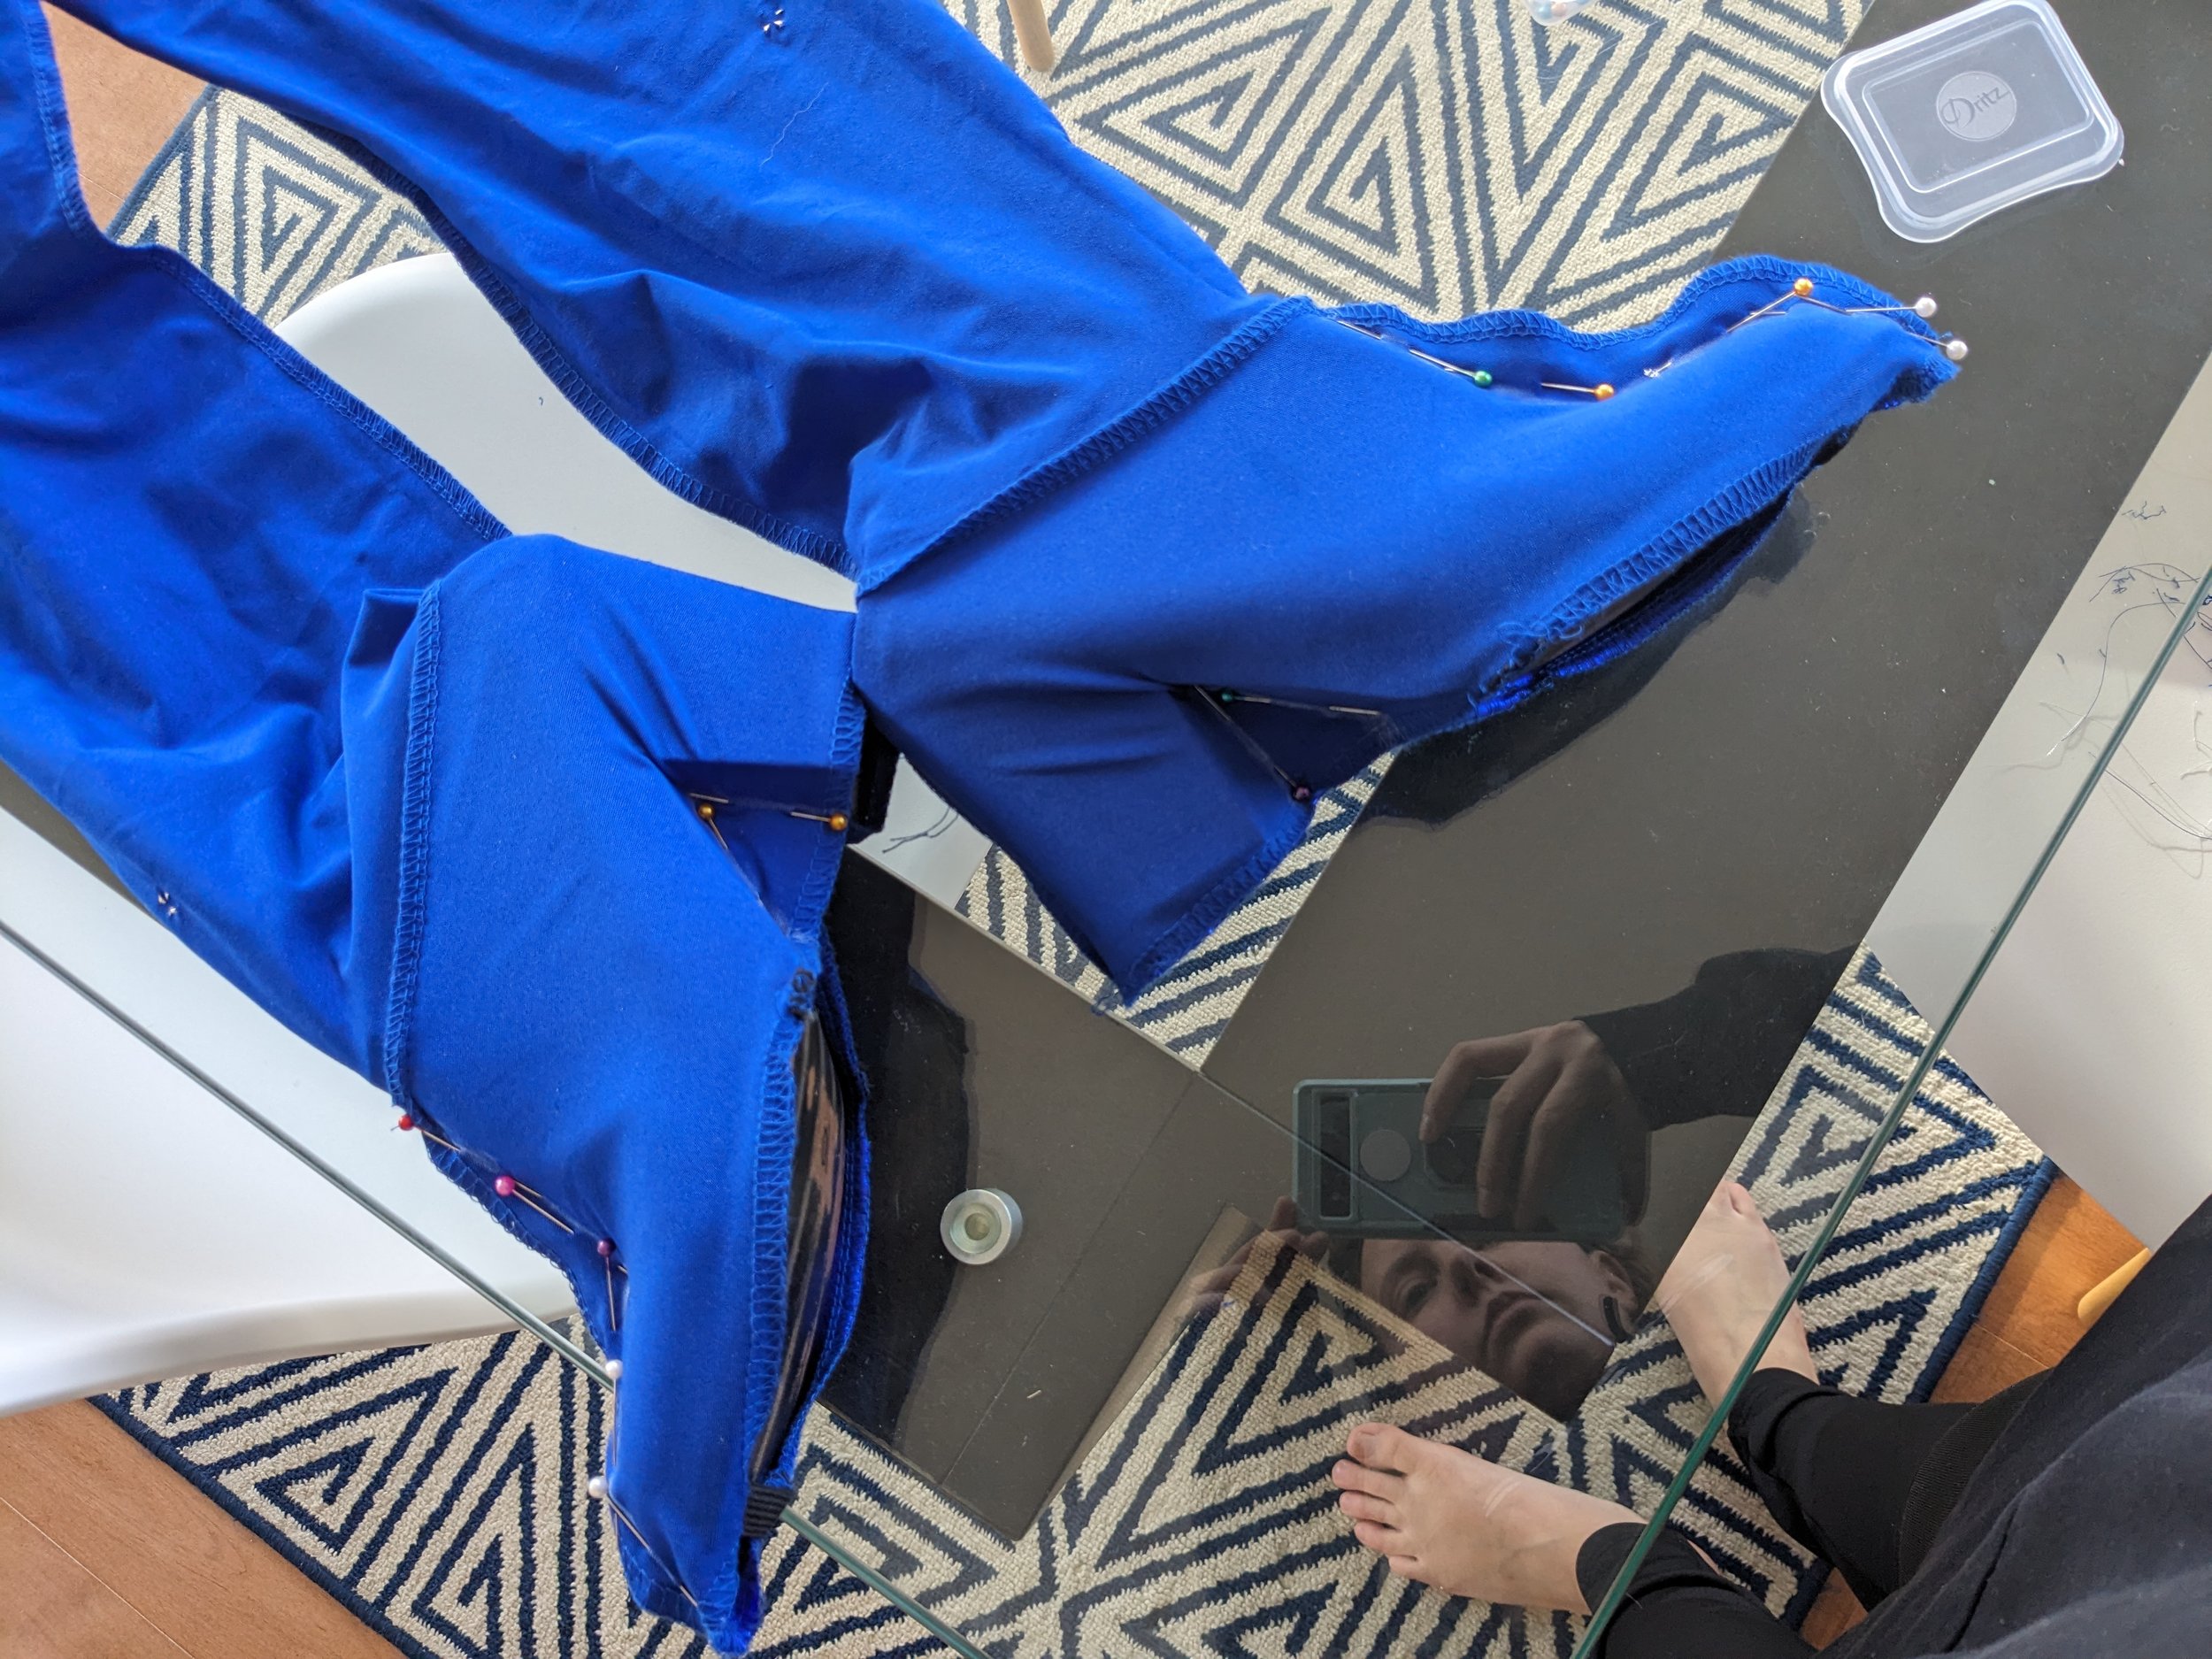
PRINCESS KITANA MORTAL KOMBAT BOTTOMS UPGRADES
Starting point…
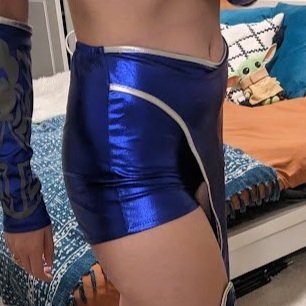
The bottoms fit just fine, but I didn’t like how the silver trim stopped on the sides. So here’s what I did:
Hand sewed rhinestone trim over the silver edges (with a thicker trim along the bottom)
Extended the rhinestone to go all the way around my back without sewing it to the back because it needed to stay stretchy for me to get into the shorts.
Attached a “hook and eye” closure on the side to connect the trim to the other side.
The result…
Click here to go back to the Tutorial Table of Contents.
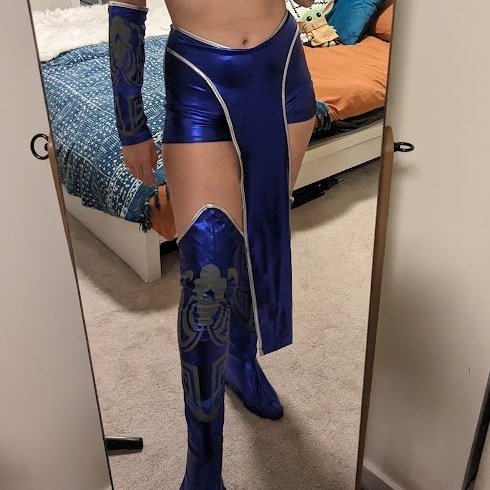
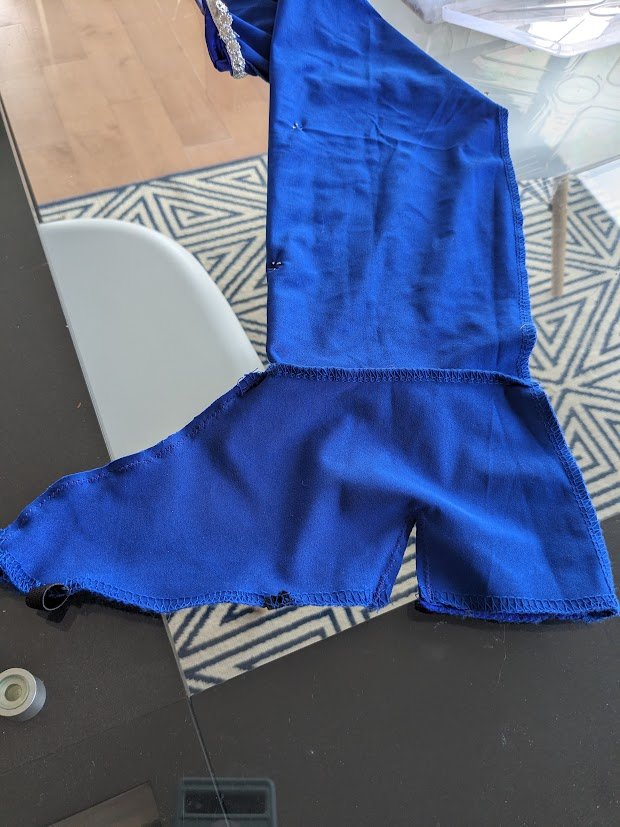
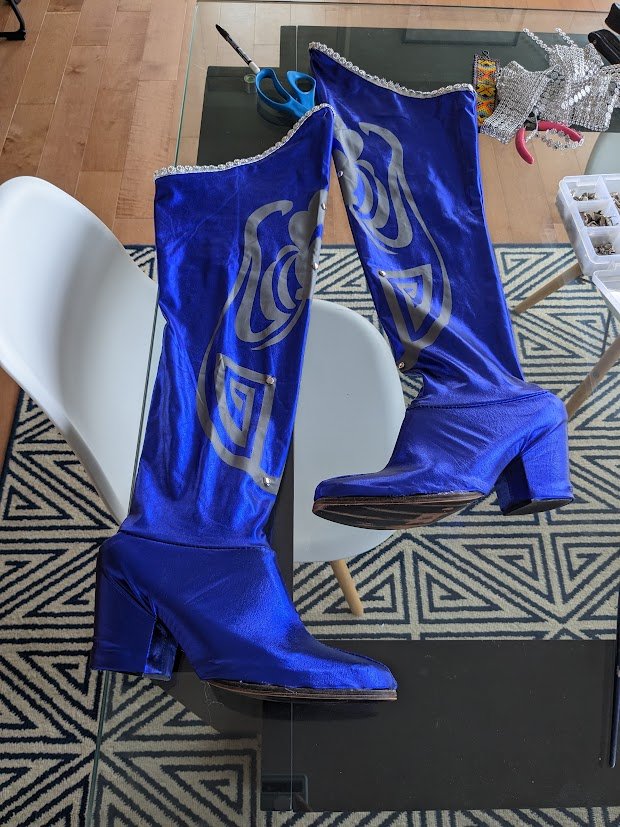
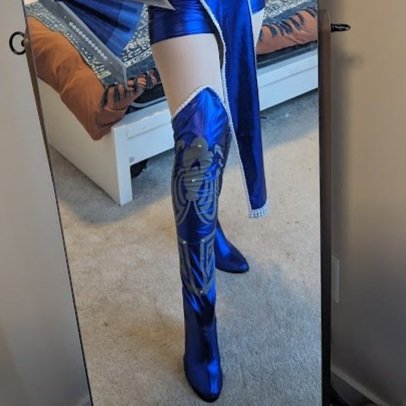
PRINCESS KITANA MORTAL KOMBAT BOOTS UPGRADES
Starting point…
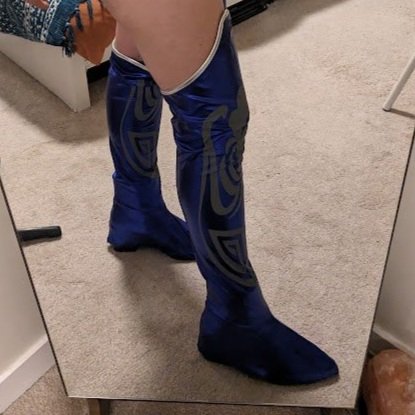
The boot covers were a really awkward shape, so I decided to get a pair of thrift store heeled ankle booties and customize the boot covers to fit them.
Here’s how I did that:
I put the booties inside the inside out covers and pinned the covers around the heel and toe area so that it fit perfectly.
I sewed along those lines.
I trimmed away the excess material.
I turned the covers back outside the right way and slipped the shoes into the covers.
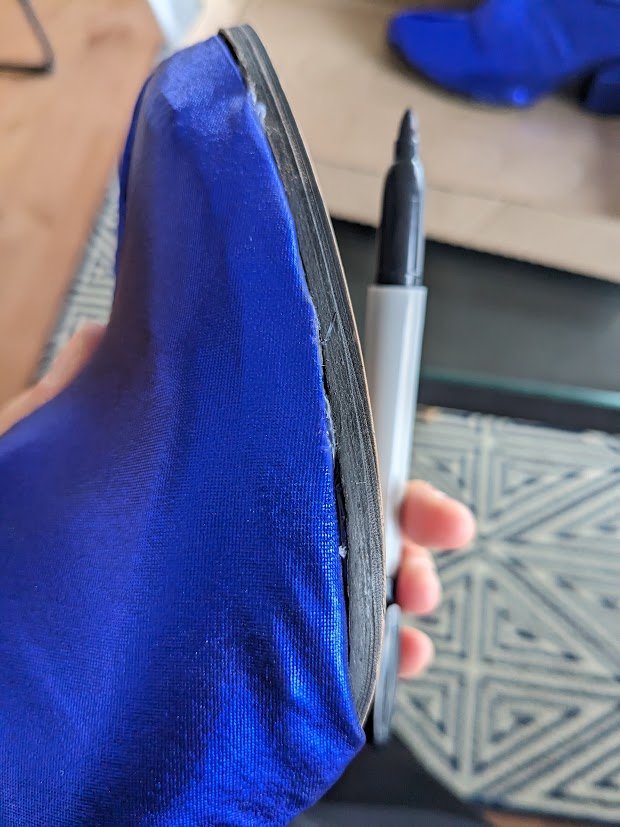
I used hot glue to secure the covers to the toes and heels of the boots.
I used a black sharpie to colour the bottom of the boots so they looked good.
I then decorated the boot covers by hand sewing silver rhinestone trim along the silver edges.
I also added a couple of silver studs to the flat printed pattern on the boots to give them more depth and visual interest.
To make sure the boot covers stayed up, I wore a thick pair of nude tights and pinned the top of the top of the covers to my tights.
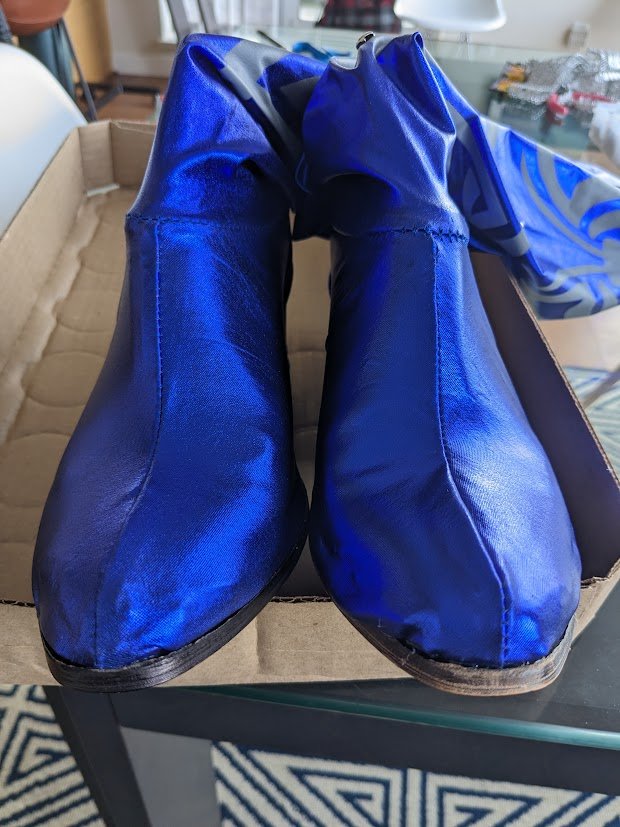
The result…
Click here to go back to the Tutorial Table of Contents.
DIY Princess Kitana Mortal Kombat Bladed War Fans Tutorial
Here’s how I made Princess Kitana’s bladed war fans step-by-step (you can follow along with the visual in the video):
1) Colouring the Fans:
First up, use that dark blue Sharpie to match your fans to your outfit.
Don't stress about the Sharpie running out; mine did and I actually liked the look of it!
2) Creating the Blades:
Trace and cut out blade shapes on black poster board.
Make more blades using the first one as a template.
3) Painting the Blades:
Brush on silver paint for a sleek metallic look.
Allow it to dry.
4) Enhancing Blade Details:
Section off parts of the blade tips with painter's tape.
Add the white pearl-silver mix for extra depth.
5) Adding Trim and Studs:
Attach silver rhinestone trim with hot glue at the blade centers.
Add two silver studs to each blade.
6) Assembling the Princess Katana Fans:
Glue those blades onto the fans with hot glue.
7) Final Touches:
Ta-da! Your 3D-effect katana fans are ready to impress.
Click here to go back to the Tutorial Table of Contents.
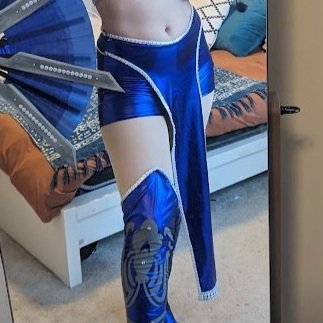
END RESULT:
FINISHED PRINCESS KITANA MORTAL KOMBAT COSTUME
Once you've got all your pieces together, it's time to put it all together for a #FlawlessVictory! Here's how mine turned out:

Photographer: Christopher Woo | @woo_media
I hope you found this guide helpful and that it showed you how some simple upgrades can go a long way in making a store-bought cosplay look awesome!
Now go and “finish them” and win the tournament (whether that’s your next convention or photoshoot!). 🚀And don't forget to follow me on social media for all the latest updates and cosplay-related tips!
With love,
Your favourite Princess of Edenia,
